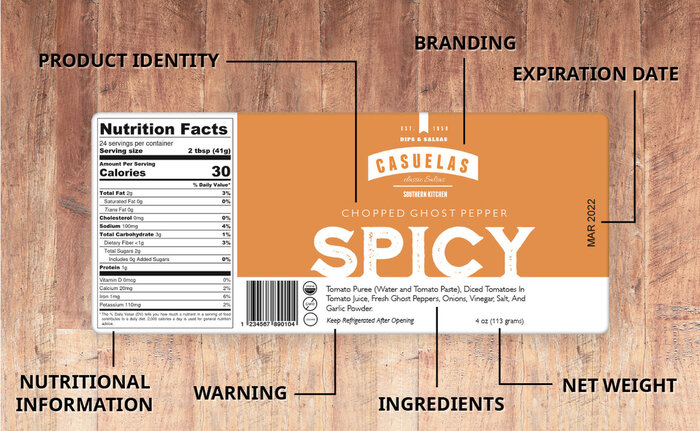
There is a faster way to create beautiful, custom product labels for your small business. Here's how!
Are you getting ready to make product labels for your food and beverage, health and beauty or other packaged goods business in Canada? Then, you’re definitely going to want to take a look at these easy, time-saving tips!
Get To Know Canadian Product Label Requirements
Before you begin designing your labels, get to know the federal and provincial rules for adding information to your product labels. The Canadian product label requirements do differ by industry, so you’ll want to look for information that speaks directly to your products. Here are two Government of Canada webpages with useful information.
Canadian Label Requirements for Food & Beverages
Canadian Label Requirements for Cosmetics & Beauty Products
Easy Text Fill
The Easy Text Fill tool is a great way to establish a product label template, which can help speed up the process of creating additional labels that follow the same basic layout. When you arrange your design once, and place the text fields where you want them, the easy Text Fill tool gathers all of these fields and allows you to edit them in a single window. This means no clicking around from box to box when it’s time to change the contents. You can edit details like the product’s name, flavour or scent, ingredients, and any instructions in one convenient box.
Once you are done editing your label information, click Apply and your changes will be added. After that, it’s easy to move and adjust text boxes as needed so that everything looks the way you want it to.
Use the Mail Merge Feature
The Mail Merge function is one of the biggest timesavers available with our Design & Print Online tool. Beyond making quick work of shipping and addressing labels, our Mail/Data Merge function makes it easy to change certain text elements in your label design, like the flavour of an organic juice, without starting a new printing run. These are also known as variable data labels.
Creating variable data labels for different flavours, fragrances, strains, or other options in DPO is as easy as uploading a spreadsheet. Take a look at this tutorial on how to add variable data to your labels to get started!
Use the Barcode Generator
Adding barcodes or QR codes to product labels is incredibly easy, thanks to the barcode generator integrated into the Avery Design & Print Online tool. All you have to do is click QR and Barcode from the menu on the left-hand side in DPO. Then, select your code format , such as “QRCode.” After that, choose your code type: text, email, URL, phone number, vCard, or MeCard, and fill in the window below with the appropriate content you would like displayed. When you’re done, click “Finish.” For complete step-by-step instructions visit /en/blog/how-to-create-your-own-barcodes/.
Finishing Your Product Labels
Once you’ve completed your label, it’s ready for you to review, then print or choose professional printing from Avery. If you’re just starting out and need a small batch of labels, it might be a good idea to purchase our printable labels and print them yourself.
For a more premium look or if you need a large number of labels, try our professional printing service, Avery WePrint. These custom labels are printed on industry-leading digital presses and are great when you’re ready to take your business to the next level.
If you find that you need help at any point when creating your new product labels with Avery, feel free to contact our friendly, knowledgeable and bilingual, Canadian based consumer care representatives, Monday – Friday 8:00am – 4:30pm EST at (888) 462-8379.


Validate your login