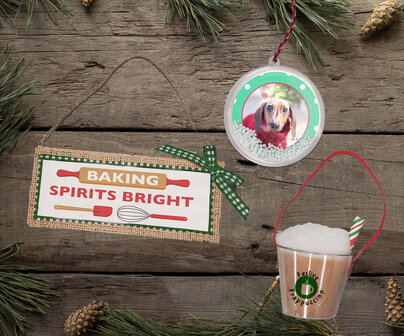
Add personalized fun to your holiday tree and other seasonal décor with this trio of DIY ornaments!
These ornaments are easy to make, only require a few items, and are excellent crafts for kids to make! Ready to get crafting? Here is what you can make!
Snow Globe Ornaments
Snow globe ornaments (sometimes called shaker ornaments) are a fun way to add personal pictures to your holiday tree or other festive display. They are easy to create, and make wonderful keepsakes for parents, grandparents, and friends.
Here is what you need to create a DIY snow globe ornament:
Clear, plastic, 2-piece round ornaments – It is important that these ornaments can be separated into two halves because you only need one half to make each ornament.
Poster board
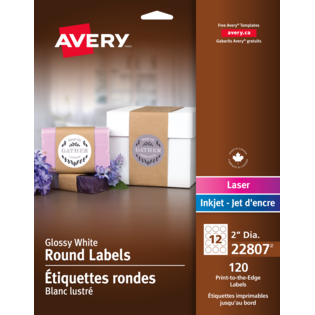
Avery 2” Glossy Round White Labels
Add-Ins like glitter, confetti, or little foam balls (to look like snow).
Ribbon
Here is How to Assemble Your DIY Snow Globe Ornament
Separate your plastic ornament into two halves. Set half aside.
Next, design and print the round label you will be adding to each ornament. This is where you can add a photo or other image to your project. Keep in mind that your label should be slightly smaller than the poster board back. For this example, we have used a 2” Glossy White Round Label.
TIP: To add different images to each label when using our Design & Print Online tool, simple click the Edit One box in the top right corner of your screen.
Next, cut a circle of poster board the same diameter as the opening of your ornament half, then add the label to the middle and set aside. Then take your ornament half and flip it onto the curved side before adding glitter, confetti or other add-ins. Use just enough to settle at the bottom of the ornament when hanging.
Finally, apply a layer of glue around the inside edge of your poster board round and attached it to the ornament. Set aside to dry. Once it has dried, attached the ribbon, and you are done.
Mini Wood Signs
These mini wood signs are quick and easy to make, but can last for a long time, since the printed on part is made with cotton fabric! Craft one or a few to add homespun charm to use as a decoration for your tree or throughout your home.
Here is what you need to create a mini wood sign ornament:
A small craft wood rectangle (available at your local craft store or dollar store)
Decorative Trim (Ribbon, burlap, etc)
Craft Glue
Twine or String
Here is How to Assemble Your DIY mini wood sign ornament:
Design & Print your printable fabric rectangle. TIP: A great way to get the perfect rectangle size for your project is to use the template for a rectangle label of a similar size. Be sure to have the Edit One button activated to edit each individual rectangle.
Next, cut out your rectangle and iron it on to the wood (following package directions).
Then, add decorative trim to the front of the sign using craft glue or hot glue. Once the glue has dried, flip the sign and attach twine or string to hang.
Sweet Sips
Celebrate your love of seasonal sips with these adorable mini cup ornaments. They are so incredibly easy to make that kids can create them on their own, with minimal help! Use craft felt and pompoms to create a variety of different drink style like frappucino, milkshakes, and boba tea! Then, apply Avery Glossy Clear Round 1” labels to add a printed on look to your cups.
Here is what you need to create mini sweet sip ornaments:
Clear plastic shot glasses (available at your local dollar store or party supplies store)
Felt
Large white Pompoms
Black Seed beads (if making boba tea)
Avery 1” Glossy Clear Round Labels
Straws
Ribbon
Cellophane wrap (if making boba)
Craft Glue
Here is How to Assemble Your mini sweet sip ornaments:
Frappuccinos or milkshakes – For each, cut felt into a rectangular strip long enough to line the inside of a plastic shot glass. Next, line the inside of your glass with the felt strip and top with 1 large, white pompom. Cut a disposable straw and insert it into the cup, between the pompom and the felt strip. Lastly, attach ribbon to the glass, design, print and apply your festive label, and apply it to the glass!
Boba Tea (Bubble Tea) –– For each ornament, cut felt into a rectangular strip long enough to line the inside of a plastic shot glass. Next, dot craft glue in two rows along the bottom of each strip. Add a bead to each dot of glue, and set aside to dry. Once the glue has dried, line the inside of a plastic shot glass with the felt.
To create the top of your boba tea, cut a circle of felt the same size as the top of your shot glass. Then, add a line of glue around the edge of the felt and attach the circle to a piece of cellophane. Set aside to dry. Once dry, trim the excess cellophane from the circle and glue the circle (felt side down) to the top of your glass. Cut a disposable straw on the diagonal and glue to the cellophane lid. Attach ribbon to the glass, then design, print and apply your festive label!
Ready to get started? Shop avery.ca or a store near you for Avery 1” Clear Round Labels, Printable Fabric, and Avery 2” Glossy Round White Labels .


Validate your login